

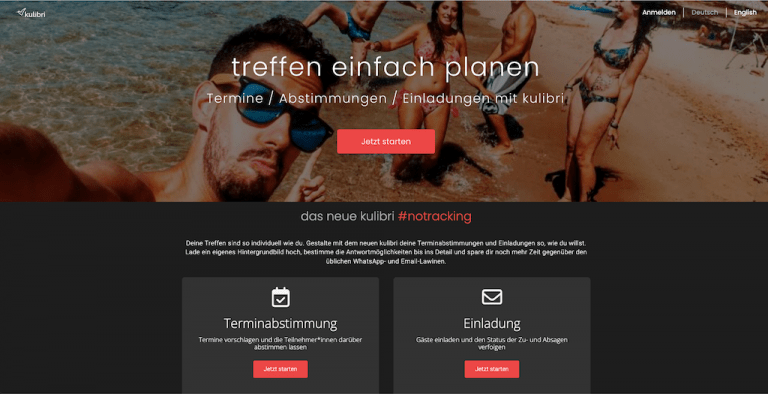
kulibri is an online tool with which you can create any kind of appointment coordination easily, quickly and without advertising.
The participants can be friends, employees, partners or members of your NGO, club or team.
Usually, the goal is to find the date that fits best for the most people in a group.
Sounds simple, but with the traditional methods – email or WhatsApp or similar – this leads to “email avalanches” or “WhatsApp battles”.
Finding a suitable date for a dinner with 10 participants usually generates at least 50 WhatsApp (or Signal etc.) messages.
Valuable time, which can be easily saved with kulibri date polls.
An date poll is created with a few clicks. Using kulibri requires no registration and is free of charge.
Create individual date polls in just a few steps
The basic principle is very simple, as with all kulibri projects:
You create the proposals for dates, send them to your participants and wait for their answers.
For this you only need an email address (we need it to send you your admin link).
For a quick walk through watch this video.
And this is how it works:
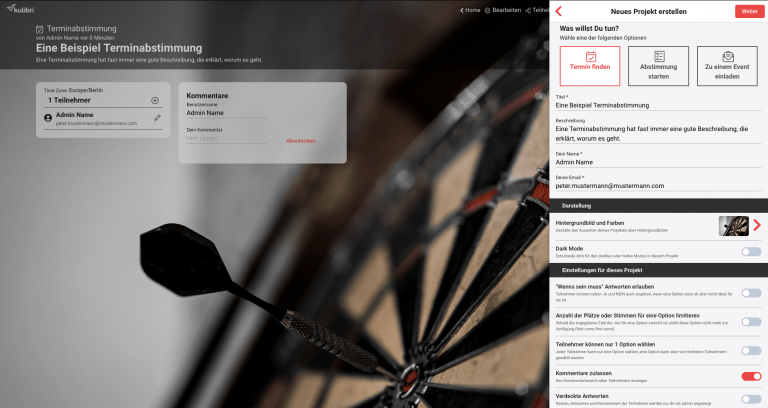
Step 1: Start from the homepage or dashboard
Click on “Start now” or “New project” on the homepage, your dashboard or on a survey page.
Step 2: Names and settings of the date poll
On the main screen you give your poll a title, a description and your email address (if you are not logged in).
After that you determine the look of the poll by choosing the background image or uploading your own. You can also choose between dark and light mode.
While you are working on the settings, you can always see in the Live Preview on the left side how your poll will look like in the end.
After that you determine the look of the poll by selecting a background image or uploading your own. You can also choose between dark and light mode.
When you are satisfied with the design, you define the settings of your poll:
(YES/NO/IF NEED BE) / Maximum votes / Single Choice / Comments (On/Off) / Hidden answers, etc.
Details can be found here
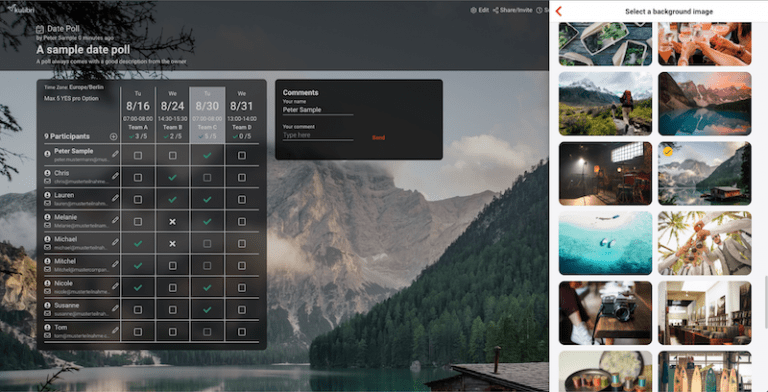
Step 3: Select days and times
Now define the days and/or times that should be available for voting.
With a few clicks on the calendar you have selected the days.
The times are optional.
In the new kulibri you can now add another dimension, e.g. for rooms, groups, locations, teachers etc.

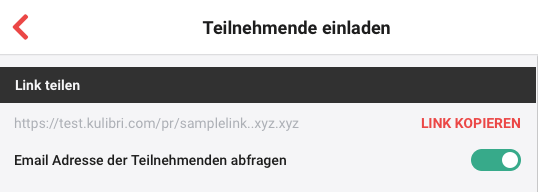
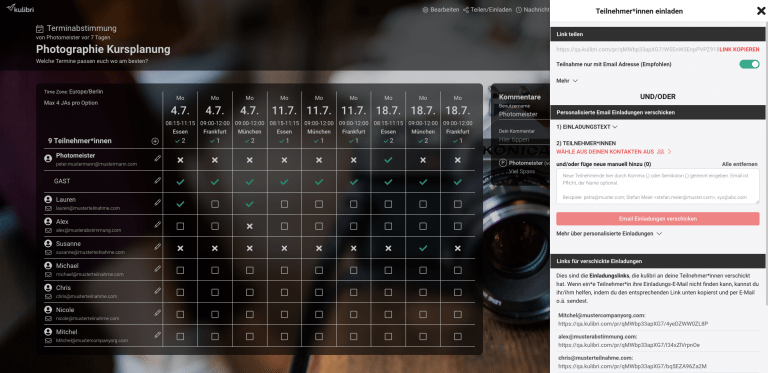
Step 4: Invite participants
In the last step you have to invite your participants.
There are several ways to do this:
- Send a general link
- Here you can specify whether your participants should simply enter their name or whether they should also enter their email address (the clearly recommended alternative for the quick processing of the poll).
- let kulibri send personalized invitations to your contacts
- select from existing contacts
- manually add new email addresses
Now you only have to wait for your participants* to submit their answers, you will always be informed.
In new kulibri you as admin also have an overview of personal links in case participants can’t find them anymore.
Just try yourself